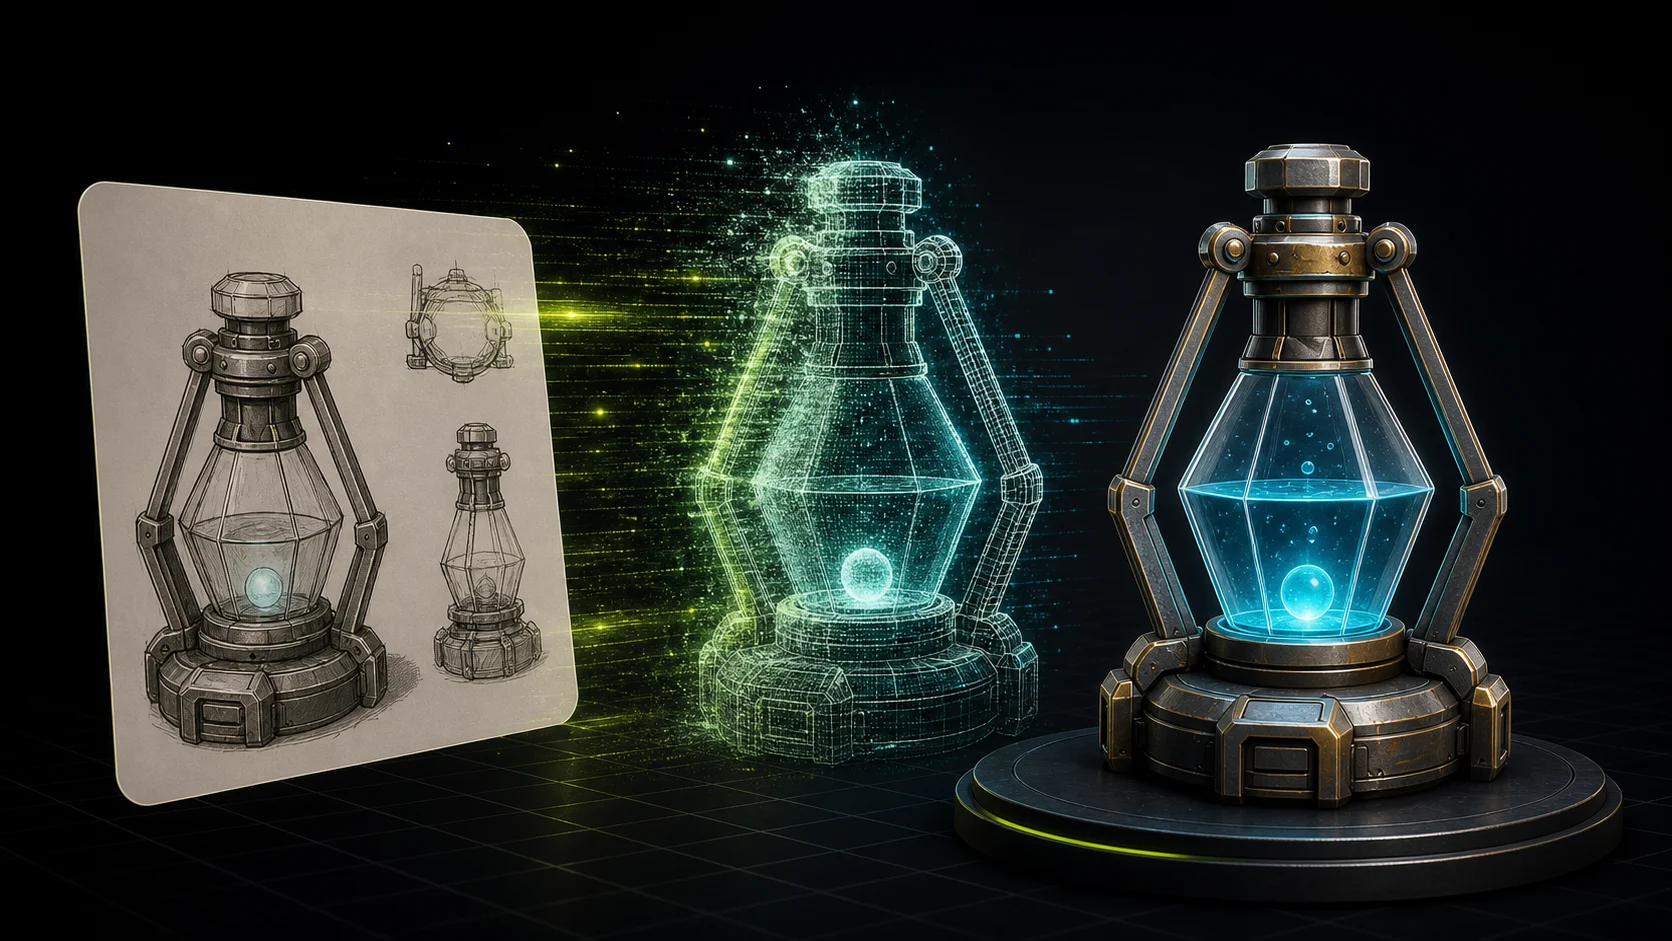
How to Make a 2D Image 3D (2026 Guide)
Type "how to make a 2D image 3D" into Google and you get a pile of mixed answers. Some results point to AI tools that build a real mesh. Others show tricks that only fake depth for a social post. The phrase means two different things, and most guides blur them together.
This guide separates them. You will learn the five real methods that turn a single image into an actual 3D model, plus a separate trick for the parallax "3D photo" look. Most of these methods take minutes in 2026, not days.
First, pick the goal that matches what you actually need.
Two Different Goals: Pick Yours First
Google's search results for this query are a mess of mixed intent, and the confusion is real. Let's split it cleanly.
Goal A: A full 3D model (a mesh). You upload one image and get back an actual 3D object you can rotate 360°, export as GLB/OBJ/STL, drop into Blender or Unity, or send to a 3D printer. This is what AI image-to-3D tools like Trify3D, Meshy, and Sloyd produce. It is also what traditional software like Blender does, just slower and with full manual control.
Goal B: A fake-3D / parallax effect (a 2.5D image). You want the photo to look three-dimensional, the kind of "3D photo" you see on social media that shifts perspective when you tilt your phone or scroll. This is not a real mesh you can rotate all the way around. It is the original image given a sense of depth using a grayscale depth map, where white means "close to the camera" and black means "far." Reddit's most-viewed thread on this exact phrase (r/AfterEffects) is almost entirely people asking for this effect: "the 3d photos you see on facebook where the view shifts when you move the camera is done with a depth map."
This guide covers both, but the main focus is Goal A: making a real 3D model, because that is where the real utility and the real product workflows live. The parallax trick gets its own section near the end, so you can jump straight there if that is what you need.
How AI Turns a Single 2D Image into a 3D Model (The Science)
If you want to trust a tool, it helps to know what it is actually doing under the hood. Modern single-image-to-3D pipelines run roughly four stages.
- Depth estimation. A neural network predicts how far each pixel is from the camera, producing a depth map: a grayscale image where brightness encodes distance. Depth estimation is the single most important step; a bad depth map means a warped, incorrect model.
- Novel view generation. Because you only have one photo, the AI has to imagine the back and sides. Diffusion models generate plausible unseen views from the depth map and the original image. As DeepLearning.AI explains, combining video diffusion with NeRF can reconstruct a 3D mesh from a single 2D image.
- NeRF / Gaussian Splatting optimization. The generated views are fused into a continuous 3D representation. A NeRF (Neural Radiance Field) stores the scene as weights in a neural network and learns it through differentiable volumetric rendering, optimizing a pixel-level photometric loss (arXiv survey, 2210.00379). NVIDIA's Instant-NeRF can learn a high-res scene in seconds.
- Mesh extraction. The trained representation is converted into a polygon mesh (via algorithms like marching cubes) and textured, ready to export as GLB, OBJ, or STL.
The practical takeaway: AI image-to-3D is genuinely good now, but it is still inferring the back of the object. The front is usually accurate; the back is a plausible guess. Keep that in mind when judging results.
The 5 Methods to Make a 2D Image 3D
There is no single best method. The right choice depends on your time budget, skill level, and what the output is for.
Method 1: AI Image-to-3D Tools (Fastest)
Upload one image, click generate, download a textured 3D model in about a minute. This is the method most searchers actually want, and the one that has improved the most in 2026.
Best for: prototyping, game assets, product visualization, concept art turnaround, anything where speed beats pixel-perfect accuracy.
Leading tools in 2026:
- Trify3D: single image to clean, game-ready mesh with sharp edges and PBR-ready textures; web-based, no install.
- Meshy: mature, supports single-image and multi-image input, exports GLB/FBX/OBJ/STL for Blender, Unity, Unreal, and 3D printing.
- Sloyd: unlimited free generations, includes auto-rigging aimed at game developers.
- Adobe Firefly: for anyone already in the Adobe ecosystem; select an image, choose Convert → Image to 3D (Adobe helpx).
Pros: minutes per model, no 3D skill needed, produces textures, runs in a browser. Cons: the back of the object is inferred (can be wrong), topology is usually dense and not animation-friendly, output needs cleanup for hero/production assets.
Method 2: Photogrammetry (Most Accurate for Real Objects)
Take 20-100 photos of a real object from every angle, feed them into photogrammetry software, and get a highly accurate reconstruction of the actual physical object, not an AI guess.
Best for: real-world props, heritage/sculpture capture, product scans where fidelity to the real thing matters.
Leading tools:
- RealityCapture (now under Epic Games): long the industry standard for speed and quality; check Epic's current terms before relying on a free tier.
- Polycam / Kiri Engine: phone-based photogrammetry, great for casual capture.
- Meshroom: free, open-source, node-based.
Pros: faithful to the real object, captures real textures from photos, no "AI guessing" the back. Cons: requires many photos and controlled capture, struggles with transparent/reflective/shiny surfaces, needs cleanup of the resulting dense mesh. This method does not work from a single downloaded image; you need physical access to the object.
Method 3: Depth Map / Displacement Conversion
Turn a 2D image's depth into a relief-like 3D surface. This is the bridge between the two goals discussed at the top: it produces real geometry, but that geometry is a heightfield (a relief), not a fully enclosed object.
How it works: generate or paint a depth map, then use it as a displacement map on a flat plane. White areas push up (toward camera), black areas stay back.
Best for: bas-reliefs, logos turned into 3D, terrain/heightmaps, 3D printing of flat-backed objects (coins, badges, lithophanes).
Tools:
- Blender: Displacement modifier with a depth/height texture, or Shader displacement.
- Depth-map generators: AI depth estimators (MiDaS, Depth Anything) produce a depth map from any single image automatically.
Pro tip: A lithophan (3D-printed photo that reveals the image when backlit) is the most popular application of this method. Sites like ItsLitho turn a photo into a printable STL in seconds.
Pros: real, predictable geometry; great for 3D printing reliefs; works from a single image. Cons: output is a surface, not a full enclosed mesh; no "back" of the object. The back is flat.
Method 4: Manual Modeling from a Reference (Highest Quality)
Import the image as a background reference in Blender and build the model by hand: trace outlines, extrude, sculpt. This is the route shown in a popular Blender Artists tutorial: import image as background, trace with a curve, convert curve to mesh, extrude.
Best for: when you need clean, animation-ready topology, exact control, or a stylized interpretation rather than a literal reconstruction.
Tools: Blender (free), Maya, ZBrush, 3ds Max.
Pros: best topology, fully editable, exact artistic control, production-ready for film/games. Cons: slow. Hours to days per asset, requires real 3D modeling skill, not "automatic."
Method 5: Local AI (ComfyUI + Hunyuan3D)
Run an open image-to-3D model locally on your own GPU. No subscription, no upload, full privacy.
Best for: privacy-sensitive work, high-volume generation without per-model cost, developers who want to customize the pipeline.
Tools: ComfyUI workflows with Hunyuan3D-2 (open-weights image-to-3D diffusion models from Tencent, 14k+ GitHub stars).
Pros: free at the margin, private, scriptable, no queue. Cons: needs a capable GPU (16GB+ VRAM ideal), technical setup, results trail the best commercial models by a generation.
Step-by-Step Workflow: AI Image-to-3D (Method 1)
For most readers, Method 1 is the answer. Here is the full workflow that works across Trify3D, Meshy, and Sloyd.
Step 1: Prepare Your Source Image
The input image is the single biggest factor in output quality. A great image produces a great model; a bad image no tool can save.
- Clean background. Remove clutter. A subject on a plain or solid background reconstructs far better than one buried in a busy scene.
- Good lighting, even exposure. Avoid harsh shadows that the AI may misinterpret as depth. Soft, even light wins.
- Front-facing, centered subject. The AI reconstructs the back from the front, so a clear front view gives the best inference.
- High resolution, sharp. 1024px+ on the long edge. Upscale blurry sources first.
- One clear subject. If the photo has multiple objects, the model will mush them together. Crop to one.
- Common formats: JPG, PNG, WebP (up to ~20MB on most tools).
Step 2: Upload and Generate
Open your tool of choice (for example the Trify3D 2D-to-3D converter), drag in the image, and generate. Typical settings to tune:
- Target polycount: lower for real-time/games, higher for rendering/3D printing.
- Texture quality: 2K is the modern sweet spot; 4K for hero assets.
- Symmetry: enable if the subject is bilaterally symmetric (vehicles, characters facing forward).
Generation takes roughly 30-90 seconds.
Step 3: Review and Refine
Do not accept the first result blind. Check the model in the viewer:
- Orbit to the back. This is where inference is weakest. If the back is broken, regenerate or try a multi-image input.
- Inspect silhouette. Look for floating geometry, melted edges, or missing parts.
- Check texture seam. Where the front texture wraps to the side, seams can be visible.
- Regenerate if needed. AI output varies run to run; a second generation is often better.
Step 4: Export in the Right Format
Match the export to your target:
| Target | Format | Notes |
|---|---|---|
| 3D printing | STL / OBJ | STL has no color; OBJ keeps textures. |
| Web / AR | GLB / glTF | The web standard; single self-contained file. |
| Unity / Unreal | FBX | Preserves rigs/materials. |
| Blender / film | OBJ / FBX | Import textures alongside. |
Quality, Limits, and the Honesty Tax
Here is the part most AI tool marketing pages bury: single-image-to-3D output is rarely production-ready as-is. Knowing the limits makes you a smarter user and a better judge of tools.
The Topology Problem
This is the number-one complaint in the community. AI-generated meshes are typically dense, triangulated, and non-editable. Threads across r/blender and r/aigamedev repeat the same story: the look is good, the topology is "garbage." Even when a result impresses visually, r/aigamedev notes that proper character topology is still beyond current AI generators.
Why it matters: bad topology means you cannot cleanly rig, animate, deform, or re-topologize the mesh without a fight. For static renders or 3D prints, fine. For animated game characters, painful.
Cleanup Is Real Work (and Real Cost)
Cleaning a generated mesh to usable topology is real work, and when outsourced it commonly runs into the hundreds of dollars per model. The visual is cheap; the production-ready version is not.
Cleanup options:
- Blender 3D Print Toolbox (free): fixes non-manifold geometry, holes, and flipped normals. Does not fix bad topology.
- Manual retopology: the reliable but slow route for clean edge loops.
- AI retopology tools: Quad Remesher, and newer AI retopology, reduce manual work but still need review.
The Back-of-Object Problem
Single-image tools infer the unseen side. For a front-facing mug, the back is usually plausible. For a complex machine or a character in a dynamic pose, the inferred back can be wrong or melted. Multi-image input (several angles) dramatically improves this. Prefer it for anything important.
Bottom line for honesty: AI image-to-3D in 2026 is a spectacular starting point, not a finish line. Use it to get a base mesh in a minute, then budget cleanup time for anything that ships.
Decision Tree: Which Method Should You Use?
- Want a usable model in under 2 minutes, no skill needed? → Method 1 (AI tool; start with Trify3D)
- Capturing a real physical object accurately? → Method 2 (Photogrammetry)
- Making a relief, logo, coin, lithophan, or 3D-printed flat-backed object? → Method 3 (Depth map / displacement)
- Need clean, animation-ready topology or exact artistic control? → Method 4 (Manual modeling)
- Privacy-sensitive or generating at high volume with no per-model cost? → Method 5 (Local AI: ComfyUI + Hunyuan3D)
- Just want a social-media "3D photo" that tilts? → The parallax method (next section)
Many real pipelines combine methods: generate a base mesh with AI (Method 1), then retopologize and refine manually (Method 4), then bake and texture it (see our companion guide on how to make textures for 3D models).
The Parallax Trick: Make a 2D Image Look 3D (Goal B)
If you came here wanting a Facebook/Instagram-style "3D photo" (a flat image given a believable sense of depth that shifts as you move), you do not need a full mesh generator. You need a depth map and a displacement effect. This is the r/AfterEffects answer.
How It Works
- Generate a depth map from your photo. AI depth estimators (MiDaS, Depth Anything, or built-in generators in Photoshop and several phone camera apps) produce one automatically: a grayscale version where white = near, black = far.
- Apply it as a displacement. In After Effects, use the Depth Scanner plugin or a displacement map effect keyed to the depth pass. In Blender, displace a subdivided plane. On phones, apps like LucidPix or the camera's native depth mode do it live.
- Animate a camera move. A slight parallax shift (foreground sliding faster than background) sells the 3D illusion.
Manual Fallback (No AI Depth)
As one Redditor put it, you can fake it by hand: make several copies of the image, mask each copy to a different depth layer (foreground subject, midground, background), scale the foreground layers up slightly to cover their backgrounds, then move them at different speeds.
This is 2.5D, not true 3D. You cannot rotate fully around it. But for social motion graphics, video intros, and "wow factor" on a feed, it is exactly what the phrase often means, and it is fast and free.
Best Free Tools for 2D-to-3D in 2026
You can build a complete pipeline without paying.
| Tool | Method | Best For |
|---|---|---|
| Blender | Manual / depth / cleanup | Full free 3D suite, retopology, displacement reliefs |
| Meshroom | Photogrammetry | Free, open-source reconstruction |
| ComfyUI + Hunyuan3D | Local AI | Free, private, scriptable |
| MiDaS / Depth Anything | Depth maps | Free depth estimation for displacement/parallax |
| ItsLitho | Lithophan | Photo → printable STL |
Common Mistakes to Avoid
- Using a low-quality source image. Blurry, cluttered, or badly-lit inputs produce garbage outputs regardless of tool. Fix the input first.
- Expecting production-ready topology from AI. Generated meshes are dense and messy. Plan for cleanup on anything that animates.
- Trusting the inferred back. Always orbit to the unseen side and verify; regenerate or use multi-image input if it is broken.
- Confusing the two goals. If you want a rotatable mesh, a parallax/depth effect will not give you one. Pick the method that matches your actual goal.
- Exporting the wrong format. STL for printing (no color), GLB for web, FBX for game engines. Match format to destination.
- Ignoring polycount. A 5-million-triangle mesh will not run in a game or print cleanly. Decimate to a sensible target.
- Skipping texture seams check. Visible seams where front texture meets the side break realism; fix in the viewer before export.
How Trify3D Fits In
Trify3D covers Method 1, the fastest path from a 2D image to a usable 3D model. Drop a single photo, sketch, or concept art into the 2D-to-3D converter, generate in about a minute, and export GLB, OBJ, FBX, or STL for any 3D workflow: games, AR, product viz, or 3D printing.
Pair it with the rest of this guide: generate your base mesh with Trify3D, retopologize in Blender if you need clean edge loops, then texture it using the methods in our 3D texturing guide. That is a concept-to-finished-asset pipeline you can run in an afternoon.
Related Searches (Quick Answers)
People searching "how to make a 2D image 3D" often look for these specific angles:
- "Can I convert a 2D image to 3D?" Yes. AI tools (Trify3D, Meshy, Sloyd) do it from a single image in about a minute. Photogrammetry needs many photos of a real object. Blender can do it manually from a reference.
- "How to convert 2D shape to 3D?" In Blender: import the shape as a reference, trace it with a curve, convert the curve to a mesh, and extrude. For simple shapes, the SVG → extrude route (via Inkscape → Blender) is fastest.
- "Turn a 2D image into a 3D print file?" Use an AI tool or depth-map method, then export STL. For flat-backed objects (coins, lithophans, logos), the depth-map/displacement route is ideal. See Trify3D's converter for image-to-STL.
- "Can ChatGPT create a 3D model?" Not directly as a downloadable mesh. ChatGPT can write 3D code (Three.js, OpenSCAD, Blender Python scripts) and describe models, but it does not generate GLB/OBJ files from an image. Use a dedicated image-to-3D tool instead.
- "Make a 2D image look 3D / 3D photo effect." That is the parallax/depth-map trick in the dedicated section above: a 2.5D effect, not a real mesh.
- "Image to GLB / STL / OBJ." All major AI tools export these formats. GLB for web/AR, STL for printing, OBJ/FBX for DCC software.
- "2D image to 3D in Blender." Three routes: trace-and-extrude from a reference (full control), depth-map displacement (reliefs), or import an AI-generated mesh and refine. Blender is also the best free tool for cleanup and retopology.
- "AI image to 3D model free." Sloyd offers unlimited free generations; ComfyUI + Hunyuan3D is free if you have the GPU. Most commercial tools (Trify3D, Meshy) have free tiers for trying them out.
Frequently Asked Questions
Can I convert a 2D image to 3D for free?
Yes. Sloyd offers unlimited free image-to-3D generations. ComfyUI + Hunyuan3D is fully free if you have a capable GPU. Blender handles the manual, depth-map, and cleanup routes at no cost. Commercial tools like Trify3D and Meshy have free tiers for trying them out.
How long does it take to make a 2D image 3D?
With an AI tool: roughly 30-90 seconds to generate, plus a few minutes to review and refine. Photogrammetry: an hour or more including capture and processing. Manual modeling in Blender: hours to days depending on complexity. The parallax depth-map effect: minutes.
Can ChatGPT create a 3D model?
Not as a downloadable mesh file. ChatGPT can generate 3D-related code (Three.js scenes, OpenSCAD scripts, Blender Python) and describe models in words, but it cannot turn an image into a GLB/OBJ/STL. For an actual model from an image, use a dedicated image-to-3D tool.
How do I turn a 2D image into a 3D print file?
Generate a 3D model from the image (AI tool or depth-map method), then export as STL or OBJ. For flat-backed objects like coins, badges, and lithophans, the depth-map/displacement route is ideal because it produces clean relief geometry. Always check the model is manifold (watertight) before printing. Blender's 3D Print Toolbox verifies this for free.
What kinds of images work best for image-to-3D?
A single clear subject on a clean background, well-lit with even exposure, front-facing, sharp, and high-resolution (1024px+). Avoid cluttered scenes, harsh shadows, and low-resolution sources. The front view matters most because the AI infers the back from it.
Is AI image-to-3D output production-ready?
For static renders and 3D prints, often yes after a quick check. For animated game characters and hero assets, usually no. The topology is dense and messy and needs cleanup or retopology. Outsourced cleanup commonly runs into the hundreds of dollars per model for usable topology. Treat AI output as a strong starting point, not a finish line.
How is single-image-to-3D different from photogrammetry?
Photogrammetry reconstructs a real object from many photos taken from many angles. Faithful, but requires physical access and many images. Single-image AI tools infer the unseen parts of an object from one photo. Fast and works on any image, but the back is a plausible guess, not a measurement.
What is the difference between a 3D model and a 3D (parallax) photo?
A 3D model is a real mesh you can rotate 360°, export, edit, and print. A parallax "3D photo" is a 2D image given a depth illusion using a depth map. It shifts perspective as you move, but you cannot fully rotate around it and there is no real "back." The first needs an image-to-3D tool; the second needs a depth map and displacement.
Can I convert a product photo into a 3D model?
Yes. This is one of the most popular use cases. A clean product photo on a plain background is ideal input for AI image-to-3D. The result is great for e-commerce 3D viewers, AR try-on, and marketing renders. For exact dimensional accuracy (engineering parts), prefer photogrammetry or manual CAD.
Next Steps
- Decide your goal: full mesh (Methods 1-5) or parallax effect (dedicated section).
- Prepare your best source image following the rules in Step 1.
- Try the Trify3D 2D-to-3D converter for the fastest path to a real model.
- Review the output, especially the inferred back, and regenerate if needed.
- Export in the right format for your destination (STL/GLB/OBJ/FBX).
- For production assets, budget cleanup or retopology time, then texture with the methods in our 3D texturing guide.
Making a 2D image 3D used to mean days of manual modeling or an expensive photogrammetry rig. In 2026 it can be a minute-long AI generation, a depth-map relief, or a parallax effect, depending on what you actually need. Pick the method that matches your goal, respect the limits, and you will get results that ship.
Run it yourself in Trify3D
Keep reading from this topic
How to Use Blender for 3D Modeling (Beginner's Guide 2026)
Learn how to use Blender for 3D modeling step by step: first model, essential hotkeys, export formats, and when the AI shortcut beats manual modeling.
TutorialsComfyUI 3D Models: Best AI Models & VRAM Guide
Generate 3D models in ComfyUI with Hunyuan3D 2.0 & TRELLIS.2. Compare workflows, VRAM needs, and export to Blender or STL. Try free online tool.
TutorialsHow to Make STL Files: 4 Ways, From Tinkercad to AI
Learn how to make an STL file four ways: free browser tools, parametric CAD, Blender sculpting, and AI image-to-3D. Includes export settings, print-readiness checks, and the exact tolerance values that matter.