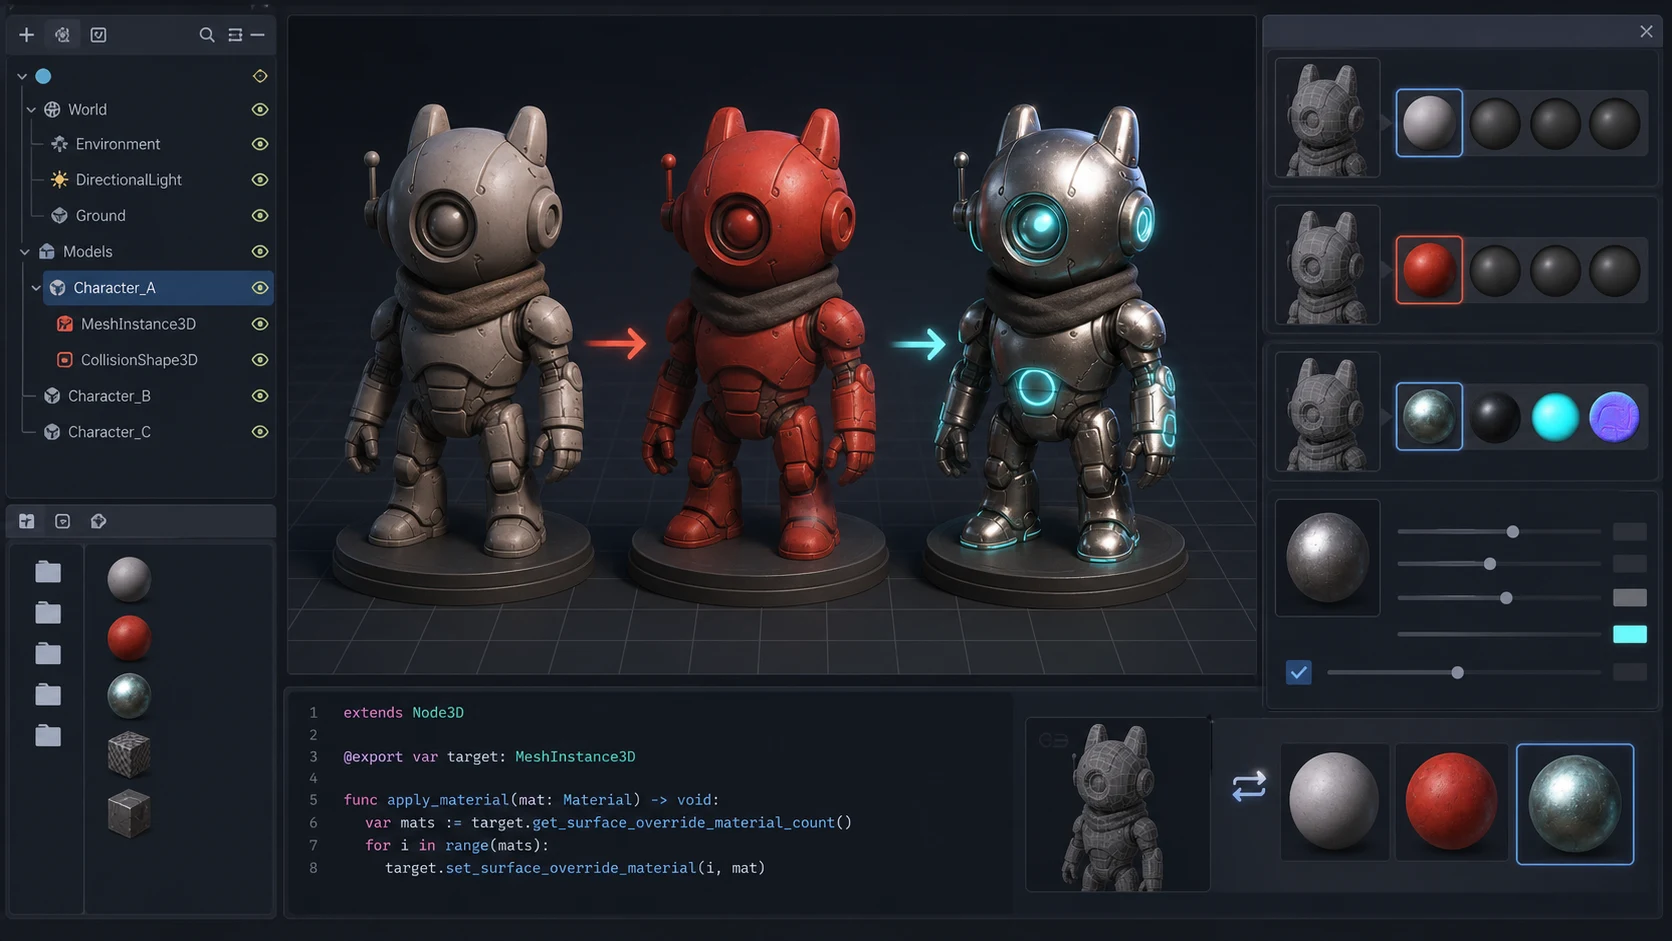
How to Change a 3D Model's Material in Godot 4
Changing a 3D model's material in Godot 4 trips up almost every newcomer, because the engine gives you four different places to put a material, and the one you pick decides whether your change affects one node, one scene, or every copy of the model in your game.
This guide walks through both ways to do it: point-and-click in the editor, and at runtime with GDScript. By the end you'll know exactly which slot to use, how to recolor a single surface on a multi-material model, and how to dodge the classic "all my enemies turned red" bug.
Already have a model but need it game-ready? You can generate a 3D model from a single image, export it as GLB, drop it into Godot, then follow this guide to dress it in the right material.
The short answer
Godot offers four material slots, and their priority is strict. When the engine draws a surface, it checks them in this order and uses the first one it finds:
GeometryInstance3D.material_override: highest priority, covers every surface on the node.- Surface Material Override (
MeshInstance3D): per-surface, tied to the node, not the mesh. - Node Material (
MeshInstance3D.material): the node's own material slot. - Mesh resource material: baked into the
.meshasset itself, shared by everything that uses it.
The practical rule: put your material on an override slot, never on the mesh resource, unless you genuinely want every instance of that mesh to share it.
The reason is simple. Materials are Resources, and Resources are shared by reference. Edit the mesh resource's material and you edit it for every node and every scene that references that mesh. Overrides live on the node, so each instance can have its own.
Change a material in the editor
This is the fastest path when you're building a scene by hand.
- Select your
MeshInstance3Din the scene tree. - Open the Inspector and expand the Geometry section.
- Scroll to Material Override (single material for the whole mesh) or Surface Material Override (one slot per surface; use this for multi-material models).
- Click
<empty>→ New StandardMaterial3D. - Expand the new material and tweak its properties (details in the next section):
- Albedo → Color for the base color, Albedo → Texture to plug in a diffuse map.
- Metallic and Roughness for PBR response to light.
- Emission for self-lit glow.
- Texture → Normal for surface detail without extra geometry.
- Texture → ORM (or separate Roughness/Metallic/AO) for realistic material response.
That's it. The material is now tied to this node. Duplicate the node, change the override, and the two copies can look completely different while sharing the same mesh data.
Working with imported models (GLB / glTF)
Imported models store their materials on the mesh resource, which Godot locks from direct editing to protect the source asset. You'll see this when you try to change an imported material and nothing happens, or you get an inheritance warning.
The clean fix: don't fight the resource. Create a fresh StandardMaterial3D, configure it, and assign it to a Surface Material Override slot. The override takes priority over the imported material, so your custom look wins without touching the original.
Tip: when exporting from Blender, use GLB rather than glTF-embedded, and keep textures as separate files so you can enable mipmap generation on import. Embedded glTF textures can miss mipmaps in Godot.
Change a material with GDScript
For anything dynamic (recoloring a character, swapping materials on hit, reacting to a color picker), you'll do it in code.
Change a single material on the whole mesh
Use material_override when the mesh has one material, or you want every surface to share the new look:
extends MeshInstance3D

func turn_red() -> void:
    var mat := StandardMaterial3D.new()
    mat.albedo_color = Color.RED
    material_override = mat
Change one surface on a multi-material model
When a model has several materials (say, a body and a separate nose) and you only want to recolor one, material_override is too blunt; it clobbers them all. Use set_surface_override_material with the surface index instead:
extends MeshInstance3D

func recolor_surface(surface_index: int, color: Color) -> void:
    var mat := StandardMaterial3D.new()
    mat.albedo_color = color
    set_surface_override_material(surface_index, mat)
The surface_index corresponds to the slot order you see under Surface Material Override in the Inspector: 0 is the first, 1 the second, and so on.
Read the material that's actually rendering
If you need to know which material is currently winning (override, node, or mesh resource), use get_active_material:
var current := get_active_material(0)
if current is StandardMaterial3D:
    print(current.albedo_color)
Edit an existing material in place
Instead of creating a new material every time, you can grab the active one and mutate it. But (this is the trap) if that material is shared across instances, you'll change them all. See the next section for the safe pattern.
Tuning the PBR properties
Once a StandardMaterial3D is assigned, most of the visual work happens in the Inspector under its BaseMaterial3D properties. These follow a physically-based rendering (PBR) model, so the values map to real-world material behavior rather than arbitrary sliders.
Albedo is the base color of the surface, what you'd see under flat white light. Set it with a Color for flat shading or a Texture for a painted diffuse map. A transparent albedo texture alone won't make the material see-through; you also need to switch Transparency off Disabled (covered below).
Metallic controls how mirror-like the surface is. Godot uses an energy-conserving model, so raising Metallic increases reflection while reducing diffuse color. Even at 0, a surface keeps a minimum internal reflectivity of 0.04; you can't make a real-world material completely unreflective. The separate Specular value (default 0.5) tweaks overall reflectivity and is rarely worth touching.
Roughness is the partner to Metallic: 0 gives a perfect mirror, 1 blurs the reflection into a matte surface (simulating microscopic surface imperfections). A polished sword is Metallic 1 / Roughness 0.2; chalk is Metallic 0 / Roughness 0.95. Most real materials are just a combination of these two numbers.
Emission makes the material emit its own light. The color and energy are added directly to the final image and ignore scene lighting, so an emissive object glows even in darkness. Note that emissive light only illuminates surrounding geometry if you have VoxelGI or SDFGI global illumination enabled; otherwise it just glows in place.
Normal map fakes fine surface detail without adding geometry by tilting how light hits each pixel. Godot uses only the red and green channels for better compression, and expects OpenGL-style normal maps (Y+). If your texture came from a DirectX-targeted tool, flip its green channel or the bumps will look inverted.
ORM texture bundles Ambient Occlusion, Roughness, and Metallic into one image (one channel each). This is the format Substance Painter and Armor Paint export under their Unreal preset. Use it with an ORMMaterial3D, or Godot also accepts a combined ORM map in a StandardMaterial3D's ORM texture slot.
Texture slots at a glance
| Slot | What it does | Pairs with |
|---|---|---|
| Albedo | Base color / diffuse | Albedo Color |
| Metallic | Reflectivity mask | Metallic value |
| Roughness | Matte vs glossy mask | Roughness value |
| Normal | Faked surface detail | - |
| ORM | AO + Roughness + Metallic combined | Substance/Unreal pipeline |
| Emission | Self-lit areas | Emission Color/Energy |
Transparency modes
By default every material is opaque: fast, and supports all rendering features. When you need see-through, Godot offers four modes, each with trade-offs:
- Alpha: true translucency with blending. Best for particle effects and VFX, but slow, can't cast shadows, and doesn't appear in screen-space reflections.
- Alpha Scissor: hard cutoff below an opacity threshold. Faster than Alpha, no sorting issues, casts shadows. Ideal for foliage and fences with crisp edges.
- Alpha Hash: dithered transparency for realistic-looking hair. Also casts shadows.
- Depth Pre-Pass: renders opaque pixels first, then blends the rest. Shadows work, and sorting is mostly correct.
Pick the cheapest mode that still looks right; alpha-blended materials are significantly slower, especially when they overlap.
StandardMaterial3D vs ShaderMaterial
Godot ships two built-in material types, and they cover opposite ends of the spectrum.
StandardMaterial3D is the default and what you'll use 95% of the time. It's fully parameterized through the Inspector: albedo color, metallic, roughness, emission, transparency, and slots for albedo/normal/ORM textures. No code required. The Godot docs describe it as covering "most of the features artists look for in a material, without the need for writing shader code."
ORMMaterial3D is a sibling that packs Occlusion, Roughness, and Metallic into a single texture (one channel each). It's the format Substance Painter and Armor Paint export under their Unreal preset, so it's the right choice when your texture pipeline already produces ORM maps.
ShaderMaterial is for when the standard material can't express what you want: dissolve effects, toon outlines, flowing water, screen-space distortion, or any custom lighting model. You write a shader (Godot's shading language) and expose uniforms as properties. It's powerful but heavier; reach for it only when StandardMaterial3D runs out.
You can convert a StandardMaterial3D into shader code from the Inspector when you need to push past its limits, which gives you a working baseline to edit rather than starting from scratch.
Using ShaderMaterial at runtime
A ShaderMaterial exposes the shader's uniform variables as properties you can read and write from GDScript:
extends MeshInstance3D

func set_dissolve(amount: float) -> void:
    # param name must match the uniform in the shader exactly (case-sensitive)
    material_override.set_shader_parameter("dissolve_amount", amount)
The parameter name is case-sensitive and must match the uniform declared in your shader code, not the capitalized label shown in the Inspector.
The same shared-resource trap applies here: changing a uniform on a ShaderMaterial affects every instance using it. The fix is to prefer per-instance uniforms with set_instance_shader_parameter() (faster, allows shader reuse), or duplicate() the material when that's not an option:
func unique_dissolve(base_mat: ShaderMaterial, amount: float) -> void:
    var mat := base_mat.duplicate() as ShaderMaterial
    mat.set_shader_parameter("dissolve_amount", amount)
    set_surface_override_material(0, mat)
Applying a custom shader to an imported model takes an extra step, because the imported scene holds the mesh in a locked resource. The common workaround is to extract the mesh into its own .tres file, build a new MeshInstance3D around it, and assign your ShaderMaterial, or automate that whole flow with an import script (EditorSceneFormatImporter) that runs on every reimport.
Animate material changes with AnimationPlayer
Material properties can be keyframed just like transforms. You can animate albedo_color for a hit flash, ramp emission_energy_multiplier for a charging weapon, or cross-fade between looks.
The Inspector hides the keyframe icons until you follow a specific order:
- Create the material first and assign it to an override slot.
- Select the
AnimationPlayernode so its animation panel is open. - Select the node that holds the material, then click the material resource itself in the Inspector (not just the node).
- The keyframe icons now appear next to each material property; click one to add a keyframe at the playhead.
Once keyframed, the property animates like any other track. Remember the shared-resource caveat: if the material is shared across instances, the animation will move them all. Assign it via an override with local_to_scene enabled, or animate per-instance values in code with a Tween.
Fix: changing one model changes them all
This is the single most common material bug in Godot, and it comes down to one fact: a material is a shared Resource. Every instance that references it points at the same object in memory. Edit its albedo_color through one instance and every other instance updates too, because they're all looking at the same data.
Three fixes, from best to last resort:
1. Put the material on an override slot and enable local_to_scene. Assign your material to a Surface Material Override or material_override (not the mesh resource), then check Local to Scene in the material resource's inspector. Each time the scene is instantiated at runtime, Godot duplicates the material so every instance gets its own copy.
2. Duplicate in code before editing. If you're mutating an existing shared material, clone it first:
func unique_color(base_mat: Material, color: Color) -> void:
    var mat := base_mat.duplicate() as StandardMaterial3D
    mat.albedo_color = color
    set_surface_override_material(0, mat)
3. Make the resource unique in the editor. Right-click a material in the Inspector → Make Unique. This works for instances you placed by hand in the editor, where the local_to_scene flag alone won't fire.
One thing not to do: don't put the material on the mesh resource and then flip local_to_scene. That duplicates the mesh data too, a huge waste of memory. Keep materials on node overrides, keep the mesh resource shared.
Common problems and quick fixes
My material change does nothing. You're probably editing the mesh resource's material while a higher-priority override is set. Check for a material_override or surface override taking precedence, or use get_active_material() to see what's actually rendering.
The Inspector won't let me edit my imported material. Imported materials live on the locked mesh resource. Create a new StandardMaterial3D and assign it to a Surface Material Override instead.
My texture looks blurry / aliased at a distance. The texture is missing mipmaps. Reimport it with Generate Mipmaps enabled, or export from Blender as GLB with separate texture files rather than glTF-embedded.
Transparent material renders opaque. The material's Transparency is still on Disabled. Switch it to Alpha (or Alpha Scissor / Alpha Hash for hard-edged transparency). Note that alpha-blended materials are slower and can't cast shadows.
My normal map looks inverted / like holes instead of bumps. The texture is DirectX-style (Y-). Godot expects OpenGL-style normal maps (Y+). Flip the green channel in your image editor or enable the relevant import option.
My shader parameter change does nothing. The parameter name passed to set_shader_parameter() is case-sensitive and must match the uniform name in the shader code exactly, not the Inspector label. Check the spelling and casing.
My emissive material doesn't light up nearby objects. Emission adds light to the material's own pixels but only illuminates surrounding geometry when global illumination (VoxelGI or SDFGI) is enabled in the scene.
Advanced material tricks
Once you've mastered the basics, a few built-in properties solve common problems:
- Grow pushes vertices along their normals. Combine a second black, unshaded material pass with Cull Front and a small Grow value for a cheap cartoon outline (Godot 4.5+ also offers stencil-based outlines).
- Triplanar mapping projects a texture across X, Y, and Z so it tiles seamlessly across multiple meshes without UV seams. Great for terrain and rock packs.
- Billboard mode forces a mesh to always face the camera, useful for sprites, particles, and distance indicators.
- Proximity Fade and Distance Fade fade a material based on camera distance, ideal for soft particles or revealing objects as the player approaches. Prefer Pixel Dither or Object Dither over Pixel Alpha to stay out of the slow alpha-blend pipeline.
Bring it together with Trify3D
A complete character or prop pipeline often looks like this: generate the model, bring it into Godot, then dial in the material until it fits your scene. With Trify3D you turn a single image into a downloadable mesh in minutes. Export it as GLB, import into Godot, and use the Surface Material Override workflow above to swap in your final PBR textures or recolor it per instance.
If you're earlier in the process, you can also make textures for your 3D model before wiring them into Godot's material slots, or export your model in the right format to make import painless.
Frequently asked questions
How do I change the material of a 3D model in Godot 4?
Select the MeshInstance3D, open the Inspector, expand Geometry, and assign a material to the Surface Material Override slot, or the Material Override slot for a single material. For runtime changes, use set_surface_override_material(index, mat) in GDScript, or material_override to cover every surface at once. Always prefer overrides over editing the mesh resource directly.
Why does changing a material affect all instances?
Because a material is a shared Resource. Every instance references the same object, so editing its properties changes them everywhere. Fix it by assigning the material to an override slot and enabling its local_to_scene flag, or duplicating the material in code before editing.
What is the difference between material_override and set_surface_override_material?
material_override applies one material to every surface of the mesh at once. set_surface_override_material(index, mat) targets a single surface by index, so you can change one material on a multi-material model while leaving the others untouched.
How do I change the color of an imported model's material?
Imported models store materials on the locked mesh resource. Create a new StandardMaterial3D, set its albedo_color, and assign it to a Surface Material Override slot. The override replaces the imported material without modifying the original.
Should I use StandardMaterial3D or ShaderMaterial?
Use StandardMaterial3D for almost everything; it exposes albedo, metallic, roughness, emission, and texture maps without code. Switch to ShaderMaterial only when you need a custom effect the standard material can't produce, such as dissolve, toon outlines, or animated water.
Why does my normal map look wrong (inverted or holey)?
The texture is DirectX-style, which flips the green channel. Godot uses OpenGL-style normal maps. Re-export with the green channel flipped, or convert it in your image editor.
Why doesn't my emissive material light up nearby objects?
Emission only adds light to the material's own pixels. To make it illuminate surrounding geometry, enable global illumination in the scene (VoxelGI for enclosed areas or SDFGI for open worlds).
How do I get a model from Unity into Blender before importing it to Godot?
Install Unity's FBX Exporter package, select the GameObject, and export it as an FBX with Embed Textures enabled, then import that FBX into Blender. From Blender you can clean up the model and export a GLB, which Godot imports cleanly with materials intact. See our guide on importing a 3D model from Unity to Blender for the full export and import steps.
What format should I export for Godot, FBX or GLB?
Prefer GLB. Godot imports GLB as a self-contained file with embedded textures and PBR materials, and it keeps the mesh resource editable through Surface Material Overrides. FBX works as a fallback, but its materials are harder to manage and textures often need re-linking. For a comparison of GLB, FBX, and OBJ, see our guide on exporting a 3D model in the right format.
Run it yourself in Trify3D
Keep reading from this topic
Albedo vs Normal Map: What Each Stores, When You Need Which
Albedo vs normal map explained: what each map stores, why normal maps look purple, how they work together, and three checks to tell them apart.
TutorialsTrellis 2 Complete Guide: From Install to Production Workflow
The complete Trellis 2 guide for 2026: pick an install path (ComfyUI or no local GPU), run image-to-3D, text-to-3D, and multiview workflows, fix common errors, and compare Trellis 2 vs Hunyuan 3D.
TutorialsWhat Is PBR Texturing? The 2026 Plain-English Guide
PBR texturing explained: what PBR stands for, the six core maps, the two workflows, and the mistakes that break PBR materials in Unity and Unreal.