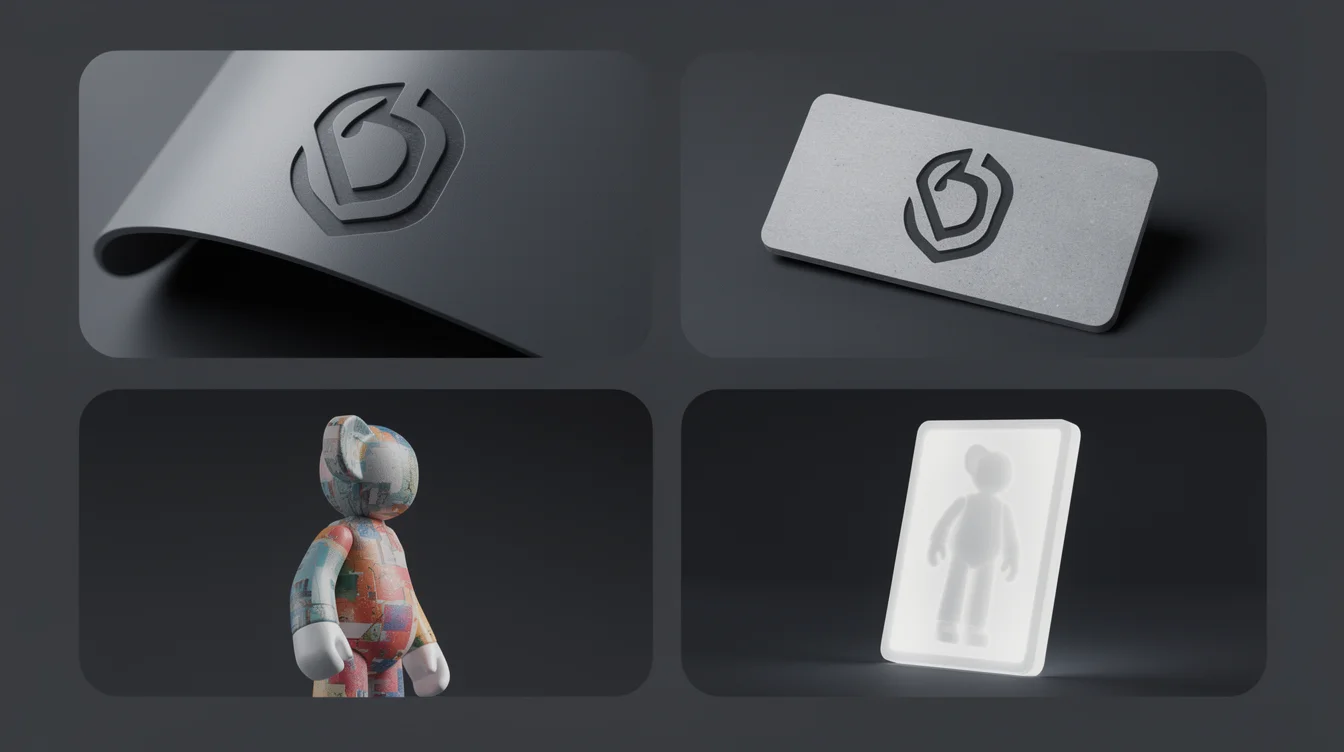
How to Imprint an Image on a 3D Model: 4 Methods (2026)
Imprinting an image on a 3D model means turning a flat picture into part of the printed object in one of four ways: either by raising it above the surface (embossing), cutting it into the surface (engraving), projecting its full color onto the surface, or reproducing it as a backlit relief. The right method depends entirely on the effect you want: a raised logo, a recessed carving, a full-color surface, or a glowing photograph.
This guide covers the four imprinting methods that rank across Google's AI Overview for "how to imprint an image on a 3d model" in 2026, with a fifth AI path for generating an entire model from a single image. Each method lists the free tools, the exact steps, and the tradeoffs so you can pick one in under a minute.
Quick Decision: Which Method Do You Need?
| Effect you want | Method | Best free tool | Difficulty |
|---|---|---|---|
| Raised logo or line art on the surface | Embossing | Inkscape + Tinkercad | Easy |
| Recessed carving cut into the surface | Engraving | Inkscape + Blender | Medium |
| Full-color image painted on the surface | Color projection | OrcaSlicer / Bambu Studio | Medium |
| Backlit photograph that glows | Lithophane | ItsLitho / Cura | Easy |
| A complete 3D model built from the image | AI image-to-3D | Trify3D / Meshy | Easiest |
Pick the row that matches your goal and jump to that section. If you are not sure, start with AI image-to-3D. It covers the widest range of use cases in the least time.
Method 1: Embossing (Raised Image on the Surface)
Embossing stamps an image onto a 3D model so it sits slightly above the surface. It is the standard technique for logos on nameplates, badges, and branded products. The raised detail is typically 0.2 to 0.4 mm, deep enough to catch light and shadow and shallow enough to print cleanly without a long supports cleanup.
The workflow converts a raster image (PNG, JPG) into a vector (SVG), extrudes that vector into 3D geometry, and merges it with the target model using a Boolean union. According to Google's AI Overview, this method covers most "logo on a 3D model" workflows.
Step-by-step: Emboss a Logo
- Convert the image to SVG. Open the image in Inkscape (free), select it, and run Path → Trace Bitmap to produce a clean black-and-white vector. Save the result as an
.svgfile. If your image is already line art or a logo, you can skip this step. - Import into your 3D software. Open Tinkercad (free, browser-based), Blender, or Fusion 360. Import both the SVG and your target 3D model into the same scene. Tinkercad auto-extrudes SVGs on import, which is why it is the easiest starting point for beginners.
- Position and scale. Move the extruded SVG so it rests on the surface where you want the logo. Set the extrusion height to 0.2 to 0.4 mm. Anything shallower disappears under a layer of paint or filament; anything taller becomes fragile.
- Combine with a Boolean union. Select both objects and group them (Tinkercad) or run a Boolean Union (Blender, Fusion 360). The two solids become one watertight model.
- Export. Export as
.stlfor a single-color print, or.3mfif you want to assign a different filament to the logo in your slicer.
Prusa3D Forum tip: For retro badge reproductions (where a character outline sits slightly above the base plastic), the community recommends Inkscape for tracing, then extruding the SVG in OpenSCAD or FreeCAD and adding it to a base plate. The 0.2 to 0.4 mm raised detail recreates the original tactile feel.
When to use embossing
- Logos and brand marks on flat or gently curved surfaces
- Nameplates, badges, and keychains
- Braille-like tactile detail
- Single-color prints where you cannot or do not want to paint
Common embossing mistakes
- Extruding too tall. A 2 mm logo looks chunky and prints with stringing. Stay under 0.4 mm.
- Tracing a low-contrast image. Garbage in, garbage out. Clean up the source image in Photoshop or GIMP before tracing, or hand-trace it in Inkscape.
- Forgetting to merge. If you print the SVG and the model as separate objects, the logo can peel off. Always Boolean union them.
Method 2: Engraving (Recessed Image Cut Into the Surface)
Engraving is the mirror of embossing: instead of adding material, it cuts the image into the model. The result is a recessed relief you can fill with paint, resin, or simply leave as shadow-catching detail. Engraving is the right choice when the image should sit flush with or below the surface. Think monograms on jewelry, decorative patterns on phone cases, or serial numbers on mechanical parts.
The steps are identical to embossing up to step 4. The only difference is the final Boolean operation:
- Embossing uses a Boolean Union (add the SVG geometry to the model).
- Engraving uses a Boolean Difference (subtract the SVG geometry from the model).
In Blender, select the model, shift-select the extruded SVG, and apply a Boolean Difference modifier. In Fusion 360, use the Combine → Cut operation. In Tinkercad, set the imported SVG shape to "Hole" before grouping.
Engraving depth guide
| Depth | Use case |
|---|---|
| 0.2 to 0.3 mm | Fine text, decorative lines |
| 0.4 to 0.6 mm | Logos, visible patterns |
| 0.8 to 1.0 mm | Deep carvings you plan to fill with enamel or resin |
Engraving wider than 1 mm wastes print time and creates a floppy overhang on the back of thin models. For deeper reliefs, switch to a full 3D relief sculpt instead.
Method 3: Color Projection (Full-Color Surface Image)
Color projection paints a full-color image directly onto the surface of a 3D model without changing its physical shape. This is the method that powers multi-color logo printing, photographic textures on miniatures, and full-color figurines. It needs a multi-material 3D printer (most commonly a Bambu Lab with an AMS unit), but the software side is free.
There are two routes, depending on whether you want to keep things in the slicer or do professional texturing.
Route A: Slicer-based projection (fastest)
Modern slicers can load an image and project it straight onto a model's surface, assigning each pixel to a filament color. The most-watched tutorial on this technique, "From Image to 3D Print: Adding Logos Using Your Slicer" by The Mountain Maker (over 287,000 views), walks through the Bambu Studio workflow.
- Import your model into OrcaSlicer, PrusaSlicer, or Bambu Studio.
- Load the image using the Paint or Image tool. Scale and position it over the target face.
- Assign colors to filaments. Each distinct color in the image maps to a slot in your AMS or palette.
- Slice and print with a multi-material setup. The printer swaps filaments at each color region.
Route B: Texture painting (professional)
For game assets, film props, or anything that needs a photographic texture rather than flat regions of color, paint the image on in dedicated 3D texturing software:
- Substance Painter (paid, industry standard): set your image as a stencil, then paint it onto the UV-unwrapped model.
- Blender (free): use Texture Paint mode with the image loaded as a stencil or projected from camera view.
Export the result as a textured .obj or .3mf and print with a compatible multi-color system. For the full UV unwrapping and PBR texture pipeline, see our companion guide on how to make textures for 3D models.
When color projection wins
- Multi-color logos and brand artwork
- Photorealistic textures on miniatures and figurines
- Game and VFX assets that also need to be 3D printed
- Any case where changing the surface shape is not acceptable
Method 4: Lithophanes (Backlit Photographs)
A lithophane reproduces a photograph using nothing but the thickness of the plastic. Dark areas of the photo print thick, light areas print thin, and when you backlight the finished print with an LED panel, the image appears, sharp, grayscale, and surprisingly detailed. The technique dates back to 19th-century porcelain, but 3D printing made it accessible to anyone with a printer and a photo.
As Sculpteo's guide defines it: "A lithophane is a way to 3D print a photo using the thickness of the print to show different shades of grey, some will be dark when others will be brighter when illuminated from behind."
Step-by-step: Make a Lithophane
- Choose your photo. High-contrast portraits and landscapes work best. Avoid flat skies or blank walls. They produce uniform thickness with no detail.
- Generate the model. Upload the photo to a free online generator:
- ItsLitho: most flexible, with curved and cylindrical options
- Cura's built-in lithophane tool: no signup, fastest for flat prints
- Image-to-Lithophane: supports plates, cubes, and curved plates
- Tune the settings. Set maximum thickness to 3 to 4 mm for desk displays, or 0.8 to 1.2 mm for lamp shades. The tool automatically converts dark pixels to thick plastic and light pixels to thin plastic.
- Print vertically in white or translucent PLA. Vertical orientation hides layer lines across the image. Translucent PLA gives the softest, most photographic glow.
- Backlight it. Place the print in front of an LED panel, a window, or a lamp. The photo only appears when light passes through.
Lithophane tips
- Resolution matters. A 0.4 mm nozzle at 0.08 mm layer height is the sweet spot. Coarser layers blur fine detail.
- Print slower. Lithophanes benefit from 30 to 40 mm/s print speed to keep walls clean.
- Curved lithophanes (for lampshades or nightlights) are supported directly by ItsLitho and Image-to-Lithophane. No manual bending needed.
Method 5: AI Image-to-3D (Generate a Whole Model From a Picture)
The previous four methods assume you already have a 3D model and want to add an image to it. If you do not have a model yet, start with our how to make a 3D model overview. But the fastest-growing technique in 2026 skips that assumption entirely: feed one image to an AI model and receive a complete, textured 3D mesh in about a minute.
This is the path that Trify3D is built for. It is also the path that dominates the YouTube results for this query. Tutorials by 3D Print Dood, DraftID, and Stefan 3D AI, each with tens of thousands of views, all follow the same core workflow. The five-step version of this workflow (find image, generate, edit, export, slice-and-print) is documented in the Instructables guide by NR Workshop, which recommends Nomad Sculpt for mesh editing and a multi-color printer for finishing.
The three-step AI workflow
- Upload your image. Drag and drop a PNG, JPG, or WebP (up to 20 MB, per Meshy's spec) into Trify3D, Meshy, or Tripo AI. A clean background, good lighting, and a single centered subject give the best results.
- Generate. Click once. According to Meshy, their Meshy 6 model reconstructs a high-fidelity mesh of up to roughly 600,000 faces with PBR textures in about one minute.
- Export. Choose from seven formats (FBX, OBJ, GLB, USDZ, STL, BLEND, or 3MF), as documented on Meshy's image-to-3D page. Use STL for single-color 3D printing, OBJ or 3MF for color, GLB for web, USDZ for Apple AR.
The resulting model can be printed directly, refined in Blender or Nomad Sculpt, or used as a base for any of the imprinting methods above. For the full breakdown of this workflow, see our guide on how to make a 2D image 3D.
Why AI changes the picture
- No modeling skill required. If you can take a photo, you can produce a printable model.
- Speed. What used to take hours of CAD work or photogrammetry now takes about a minute.
- Licensing clarity. Free tiers typically publish under CC BY 4.0 (commercial use with attribution); paid plans grant full private ownership.
For a deeper comparison of the AI tools, see our best AI 3D model generators guide.
How to Add an Image in Bambu Studio (Quick Tutorial)
Because "how to add an image to a 3D print in Bambu Studio" is one of the most-searched long-tail variations, here is the direct answer.
- Open Bambu Studio and import your model.
- Click the Paint tool (or the Image feature in newer versions).
- Load your logo as a PNG or SVG. Bambu Studio projects it onto the surface under your cursor.
- Scale and position the image with the on-screen handles.
- Assign each color region to a filament slot in your AMS.
- Slice and send to the printer with the AMS enabled.
For a raised logo in Bambu Studio instead of a painted one, extrude the SVG 0.2 to 0.4 mm in Tinkercad or Blender first, export as 3MF, then open that 3MF in Bambu Studio and assign the logo a different filament.
Related Searches (Quick Answers)
People searching for "how to imprint an image on a 3d model" often look for these specific angles:
- "How to imprint an image on a 3d model online": use browser-based tools only: Tinkercad for SVG embossing, ItsLitho for lithophanes, and Trify3D, Meshy, or Sloyd.ai for AI image-to-3D. No software install needed.
- "How to imprint an image on a 3d model free": Inkscape traces for free, Tinkercad and Blender extrude for free, Cura includes a free lithophane tool, and Trify3D plus Meshy offer free AI tiers.
- "How to add a logo to a 3D print Bambu Studio": use the Paint or Image tool in Bambu Studio to project the logo, assign colors to AMS slots, and print multi-material. For a raised logo, extrude an SVG first and import as 3MF.
- "Create 3D print from 2D image": this is the AI image-to-3D workflow. Upload one image, generate a mesh, export STL, and print. Trify3D, Meshy, and Tripo AI are the leading tools.
- "How to create a 3D print file from an image": same as above. The output file you want is STL (single color) or 3MF (color and metadata).
- "What software do I use to put a picture on a 3D model": Inkscape + Tinkercad for embossing, Blender for engraving, Bambu Studio or OrcaSlicer for color projection, ItsLitho or Cura for lithophanes, and Trify3D or Meshy for AI generation.
Common Mistakes to Avoid
- Extruding too tall for embossing. Keep logos at 0.2 to 0.4 mm. Tall embosses string, look cartoonish, and waste filament.
- Tracing low-contrast images. A muddy source image produces a muddy SVG. Clean the source first.
- Mixing up Boolean Union and Difference. Union adds (emboss), Difference subtracts (engrave). Getting them backwards produces the opposite of what you want.
- Printing lithophanes flat. Always print lithophanes vertically so layer lines run across the image, not through it.
- Expecting single-extruder color. Color projection needs a multi-material system. A single-extruder printer can only do embossed, engraved, or painted-by-hand color.
- Skipping the cleanup step on AI models. AI meshes can have floating geometry or thin walls. Run them through the repair tool in your slicer, or edit the mesh before printing.
How Trify3D Fits In
Trify3D handles the fastest-growing imprinting path, turning one image into a complete, textured 3D model in about a minute. Upload a photo or concept sketch, generate the mesh, and export as STL, OBJ, GLB, or 3MF. From there you can print it directly, refine it in Blender, or use it as the base for any of the surface imprinting methods above.
If you already have a model and only want to add a logo or photo to its surface, use Methods 1 to 4. If you want to generate a new model from a picture, start with Trify3D.
Frequently Asked Questions
Can I imprint an image on a 3D model without any 3D modeling skill?
Yes. The AI image-to-3D route (Trify3D, Meshy, Tripo AI) needs zero modeling. Upload an image and download a printable mesh. For surface embossing, Tinkercad's drag-and-drop SVG import is the closest thing to no-skill 3D work.
What image format works best for imprinting?
For embossing and engraving, convert to SVG first. Inkscape traces raster images for free. For color projection, use PNG with a transparent background. For AI generation, PNG, JPG, or WebP up to 20 MB all work.
How deep should an engraved logo be?
Use 0.4 to 0.6 mm for most logos, deep enough to catch shadow and hold paint. Go shallower (0.2 to 0.3 mm) for fine text or decorative lines, and deeper (0.8 to 1.0 mm) only if you plan to fill the engraving with enamel or resin.
Do I need a multi-color printer for color projection?
Yes. Color projection needs a multi-material system like the Bambu Lab AMS, a Palette device, or a printer with multiple extruders. Single-extruder printers can only produce embossed, engraved, or hand-painted results.
Can I imprint a color photo on a 3D model at home?
Yes, with a multi-material FDM printer (Bambu Lab AMS) or a resin printer with an LCD color kit. The slicer route in Bambu Studio or OrcaSlicer handles the workflow end to end.
What is a lithophane and how is it different from embossing?
A lithophane reproduces a photograph using plastic thickness to represent brightness. It only looks right when backlit. Embossing raises a logo or line art above the surface and is visible under normal lighting. They solve different problems.
Is AI image-to-3D accurate enough for printing?
For most decorative, prop, and prototype prints, yes. Modern AI generators like Meshy 6 produce meshes up to roughly 600,000 faces with PBR textures. For engineering or dimensionally critical parts, use CAD instead.
Can I use these methods on a curved surface?
Yes. Embossing and engraving work on curves if you use a Shrinkwrap modifier (Blender) or project the SVG along the surface normal. Color projection in slicers handles curved surfaces automatically. Lithophanes are typically flat or cylindrical.
Next Steps
- Pick the method that matches your effect from the decision table above.
- Grab the free tool for that method (Inkscape + Tinkercad, Bambu Studio, ItsLitho, or Trify3D).
- If you need a base model, generate one from an image in about a minute.
- Imprint, export as STL or 3MF, and print.
- Iterate. The second attempt is always cleaner than the first.
Learning how to imprint an image on a 3D model opens up custom branding, personalized gifts, photographic lithophanes, and full-color figurines. Start with one method, master it, then combine them. Many production prints use embossing for structure and color projection for finish on the same model.
Run it yourself in Trify3D
Keep reading from this topic
Albedo vs Normal Map: What Each Stores, When You Need Which
Albedo vs normal map explained: what each map stores, why normal maps look purple, how they work together, and three checks to tell them apart.
TutorialsTrellis 2 Complete Guide: From Install to Production Workflow
The complete Trellis 2 guide for 2026: pick an install path (ComfyUI or no local GPU), run image-to-3D, text-to-3D, and multiview workflows, fix common errors, and compare Trellis 2 vs Hunyuan 3D.
TutorialsWhat Is PBR Texturing? The 2026 Plain-English Guide
PBR texturing explained: what PBR stands for, the six core maps, the two workflows, and the mistakes that break PBR materials in Unity and Unreal.